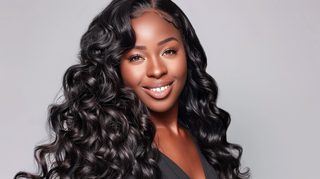
With viewing all your celebrity favorites wearing bright neon wigs and long pink extensions on Instagram, it’s time to take your 1B style to the next level. Let’s face it, though: not everyone has the time or the money to color their hair professionally. Although letting a professional stylist color your extensions can be a safer option, shelling out $200+ for a temporary look isn’t always the most practical.
The first obvious step to color your hair that we know you took was to search YouTube for “how to dye your hair at home.” Don’t be fooled; not all resources are included in those videos and you’re missing important tips from stylists about coloring hair properly.
Here are 10 things you must get right when dying your hair at home based on the recommendations of stylists we consulted with. By the end of this article, you’ll be coloring your extensions at home almost like a pro.
1. Deciding on a Hair Color and Method
Okay, so you’ve decided to take the plunge and color the hair yourself. The first and most important step is to decide on the new hair color you want for your virgin hair and the method you are going to use to color it with.
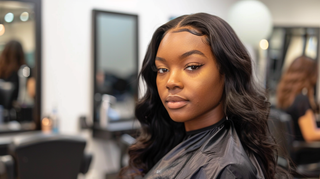
Let’s go into deciding the color first. If you want a darker hair color it is easier to color the extensions, especially if you are looking to do an ombré look. Transforming your natural virgin hair to a 1 ( jet black), red, orange or honey blonde it is best to get natural color hair extensions. If your color goal is bright (this includes pink, blues, neons, yellow, bright oranges, etc), it is best to purchase 613 hair extensions as you will have to bleach the hair first to transform to the color. At True Glory, we offer a Dyed Virgin Brazilian Collection, which comes in a 613 color; a perfect option to take the look to the next level.
You’ve decided on the color; let’s now focus on the method of coloring. There are multiple methods of coloring hair and each option is tailored to the brightness of color and your comfort of coloring. Here are some of the coloring methods you can choose from:
Box Color: This is a quick and easy way to apply hair color at home and can be purchased at any drug store. The color is semi-permanent, but still effectively colors with extensions. Usually, box color contains the color mixture, after-conditioner, gloves, and instructions. If you are achieving a natural look, this is a great option.
Bleaching: If the hair is naturally dark and want to transition to a lighter color, bleaching the hair is the best option. Bleaching removes your hair’s natural pigment by breaking down the keratin while the developer acts as a decider on how much to lift the color out of the hair.
Water Coloring: For this method, the extensions are soaked in a bucket of hot water mixed with hair coloring. The hair quickly takes on the desired hair coloring after soaking. This is a quick and efficient way to color the hair to a bright color without painting each strand with hair coloring.
2. Coloring Pre-prep
While you are deciding on what color and method you want to use for coloring, it is best to get the extensions ready for the coloring process. It is very important to treat your extensions as you would treat your natural hair. This requires taking extra care into protecting the hair from the harsh coloring you are about to perform. You can do this by purchasing the hair well before your coloring process and performing deep conditioning and repair mask treatments on the extensions/wig. This is especially important if you are transforming the look; for example, going from honey blonde to a pastel pink. Because color is already on the hair, getting the hair to the best state before adding more color is very important and crucial to keeping the integrity of the hair.
While you are pre-prepping the hair, you can also pre-prep for your coloring process. For different methods of hair coloring, all require more or fewer products, but one universal product that is needed for coloring the hair is gloves. Don’t even try to color the hair without gloves unless you want your hands to match your hair color. Here are some other products you need for each coloring method:
Box Color: Nothing. Box colors come equipped with all the tools you’ll need to color the hair. If the coloring applicator is too tricky and messy, you can purchase a mixing bowl and coloring brush to easy and equally apply the hair color to the hair.
Bleaching: Ok, sis. Listen carefully. Bleaching requires you to accurately purchase the proper bleach, developer, toner and hair color. Outside of the obvious, you’ll need a mixing bowl, coloring brush and aluminum foil (not everyone uses).
Watercolor Method: With the watercolor method being the easiest to achieve, the product list is also the same. You’ll need a large container for coloring the hair, hot water and the hair color itself.
3. Coloring Technique
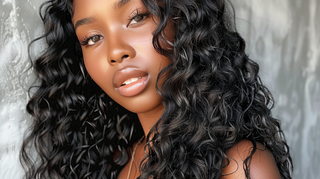
It’s easy to confuse the coloring method with the coloring technique, but they are  not the same. We already explained the coloring methods, so let’s get into the coloring technique. This is the style for coloring the hair. There are so many different techniques for coloring hair: full hair coloring, ombré, root coloring, two-tone coloring, balayage, highlights, etc. For now, since you’re learning basic hair coloring steps that are done in a salon, ombré or full extensions/wig coloring is best. Let’s leave the rest when you become a pro. It is important to also establish the technique earlier in the process and this will be the decider on how much color you should use for the hair. No matter the technique you are performing, it’s important to buy extra coloring than not enough. Nothing is worse than running out of coloring, especially going from back-to-front with coloring the hair.
4. Bleaching: Pre-Wash
Alright, ladies! Let’s get into Formation with coloring our hair! If you are coloring hair that has already been used or colored, the first important step you want to make is washing the hair before the coloring process. This is definitely a step you don’t want to miss as the extensions you have used can have a build-up of product on them. This can compromise the hair coloring and you don’t want to make a simple mistake before even coloring the hair. To avoid this mistake, wash your hair 2-3 days prior to bleaching the hair. Do not put any product on the hair. By washing the hair before coloring, this results in a better color.
5. Bleaching: Coloring Hair
Alright, this is the moment you’ve been preparing for. It’s time to bleach the hair. You’ve done all the necessary prep and you’re ready to perform this like a pro. First, section the hair as you would regularly be styling or blow drying the hair. This makes sure the color is distributed evenly and throughout the hair. Use clips to hold each section together until it is ready to be colored.
Next, you’re going to follow the instructions on your product for mixing together the bleach and the developer. You will mix this in the mixing bowl and stir with the coloring brush. You’ll be adding two parts developer to one part bleach, but whichever color you are achieving, make sure you are using the correct mixture. Stir the combination until it is smooth without lumps.
Alright, here’s the part where you will have to work efficiently and focus, so if you’re performing this while watching TV or around a child, it’s best to remove yourself for focus. While coloring the hair, you’ll need to move quickly as you have to do your whole hair and you don’t want one section to color more quickly than the other. Apply the mixture to the hair starting from the back of the head to the front first. Also, apply to the ends first, then going from the middle to the top (on your root, but not hitting your scalp for burning). Your ends are known to take a little longer with coloring, so by starting with them first, it adds extra coloring time to match the other sections.
After applying the color to the hair, read the instructions for sitting on hair and proceed with the rinsing process. Do not leave the color on for more than 30-45 minutes, but also check on the color to see if it colors to your goal quicker.
6. Bleaching: Toner
After you rinse the bleach mixture out of your hair, you’ll follow up with lightly shampooing the hair and applying the toner. If you do not want warm tone/yellow in your hair, this is why you will be applying a toner to your hair. There’s an option of also using a toner shampoo, but all toner will require washing out of the hair. If you’re using the toner solution, let it sit for 20 minutes, or the time instructed on the product bottle, and then rinse out of the hair.
7. Watercolor Bleaching:
Honestly, if you’re looking for a fun, less-intense way of coloring the hair, the watercolor method is the best and most satisfying option. For this method, you will take your container and fill it up boiling hot water. It is best not to use the hot water from your sink, but from the stove as the color will mix faster. Proceed to mix the coloring in and while following up with a coloring test by dipping a paper towel in the solution. Here’s the fun part: submerge the extensions/wig in the color also making sure it is evenly submerged. The hair will color instantly, while you can keep it in till your color liking. If you’re working with a wig, don’t worry about the lace as the watercolor method does not color the lace, but only the hair! Just like that, you’re finished in half the time and the mess!
8. After-Color Conditioning
The most important step after coloring the hair and washing for any methods listed is conditioning the hair. After washing the hair, you’ll want to let the deep conditioner sit on the hair under a dryer or shower cap and allow it to soften and gain back the integrity of each strand. Remember, bleaching is removing your hair’s natural pigment and breaking it down for the coloring process. You’ll have to work extra hard to build the integrity of the hair back up.
9. Post-Color Hair Maintenance
Yasss! We’re loving the color and it wasn’t as hard as you thought with our instructions! We’re proud of your progress, but the work doesn’t end there. It’s important to maintain the hair after coloring, just as you did with the deep conditioning. This means scraping your usual shampoo and conditioner and using products that are tailored for colored hair to regain its strength. This also means more deep conditioners and repairing mask to keep the moisture in the hair. Nothing is worse than a great color and stiff hair. Issa no.
10. Coloring Again?
Need to color the hair again because you didn’t get the desired look? Yes, this happens and it’s fine. Sometimes with pre-colored hair or transforming the hair to a drastic color, it takes a few colorings to do so. With that, allow the hair to take a rest in between colors so that it does not damage the hair. The same tip would be given to you for color correcting steps in a salon. Take two weeks then start the coloring process over, but again, strengthening the hair in between with repair mask and deep conditioning is also key.
Photo Credit: Instagram (@calihairbysevhn, @synaelwill, @cheasway, @_danified)